The design of individual UI elements and ports can be defined in "Skins". A skin is not necessary for every UI element or port, especially when a template is being used. You can create HTML and CSS definitions in a skin.
Making changes through these consoles might render your system inoperable, pose security risks for your data and users, and result in loss of compliance with data protection regulations as well as Picturepark terms and conditions. Access is dependent on your permissions, license and certification status. If you are unsure of whether you should make changes here please contact support.
If you are using the Picturepark Cloud service then some personal data stored for archiving purposes but visible for other users as described in this section of the manual is deleted periodically (every 90 to 120 days) in order to comply with the General Data Protection Regulation (GDPR) and other applicable privacy regulations.
A skin always needs to be created for terms of use and be assigned to the corresponding UI Element. The contents of the terms of use window is then entered into the skin. |
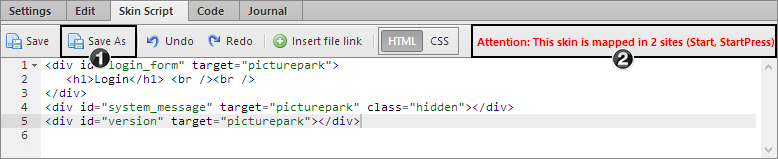
Skins can be managed in the "Skins" area or directly in the corresponding UI element or port. In the "skin script" tab the assinged skin is shown for editing.
|
Texts can be added for multiple languages. With the definition of 'pplanguageid="1"' (german example) language specific contents can be defined. The contents then also need to be hidden via css. As soon as the language is identified on loading the page then the corresponding contents is shown. Example: <div style="display:none;" pplanguageid="1">German text</div> <div style="display:none;" pplanguageid="2">English text</div> <div style="display:none;" pplanguageid="3">French text</div> <div style="display:none;" pplanguageid="78">Spanish text</div> <div style="display:none;" pplanguageid="198">Portuguese text</div>
You can use the following code to open a url directly in the corresponding UI element in a Picturepark pop up.
<a onclick="window.publisher.openUrlInWindow('http://www.URL.com', { title: 'Title', width: 500, height: 600, maximizable: true });" href="javascript:void(0);">Open pop-up</a>
Parameters
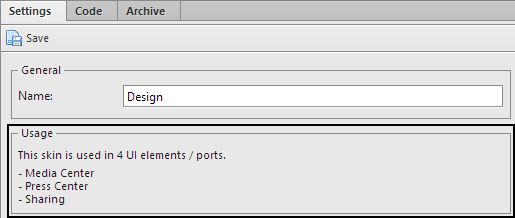
All the assignments of a port or UI element can be seen in the settings of a skin. The list only contains pages, to which the currently logged in user has rights.
|